How to serve up multiple websites from one Azure VM on different IP addresses (part 1)
In this article, I’m going to show you how to host multiple websites on the same Azure server with different IP addresses. This means that we will have a different IP address for each website (domain name). The fact that they are running on the same physical server won’t be apparent to the end user.
As it is 2023, I won’t go into detail about what a website is or how crucial it is for your project, business, or brand. So let’s get right to the tutorial’s main point.
Requirements
To follow this tutorial, all you will need is:
- an Azure subscription
- at least two domain names
- basic knowledge on Azure services and Linux systems
In this article, I’m going to use foo.com and bar.com as example domain names. Obviously, you’ll be using different domains. Replace them by yours.
Microsoft Azure
Sign in to the Azure portal
Note: The Azure region where you create each of the resources listed below should be the same. I’ve chosen North Europe as example for this write up.
Create a resource group
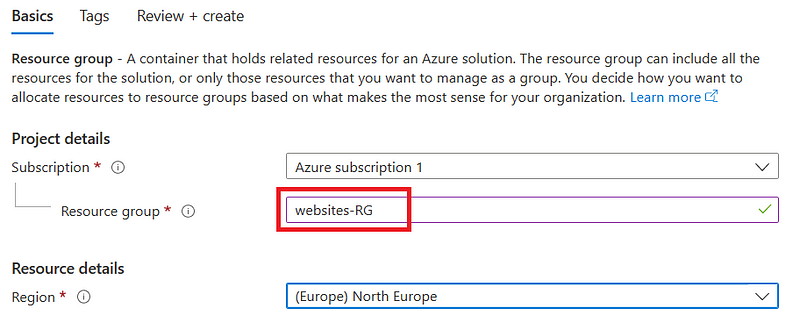
Let’s create a resource group that will house all the resources associated to this project. In this example, I will name mine websites-RG. Feel free to use whatever name you want.
Create the public IP address for each website
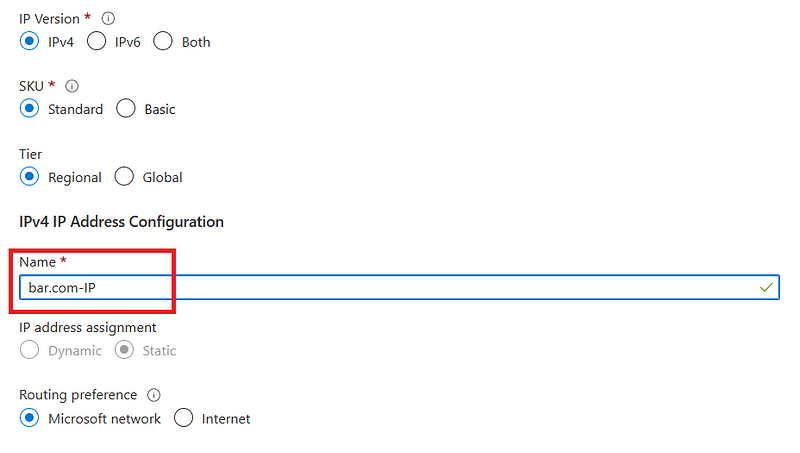
Let’s create two IP addresses in the websites-RG resource group.

foo.com public IP


bar.com public IP

Create the Virtual Machine
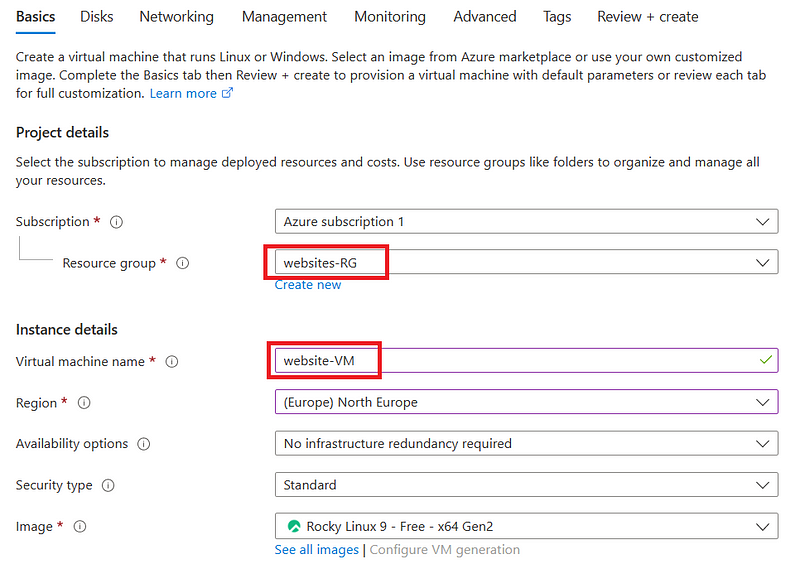
Let’s create the virtual machine that will host the websites.
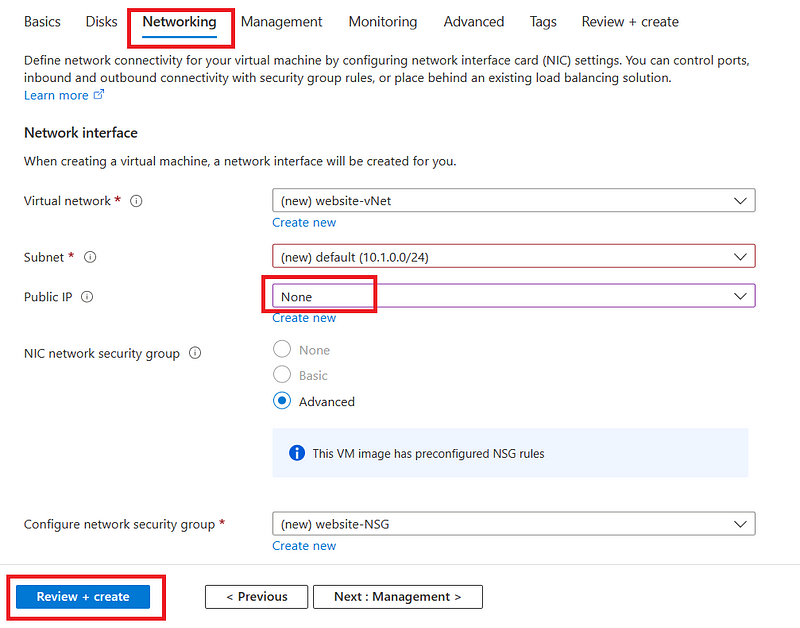
I decided to create the VM with none public IP. I will attach later the ones we created in the previous section.
Associate the IP addresses to the Virtual Machine
Go to the networking settings of the website-VM

Select the Network Interface Card (NIC) of the VM

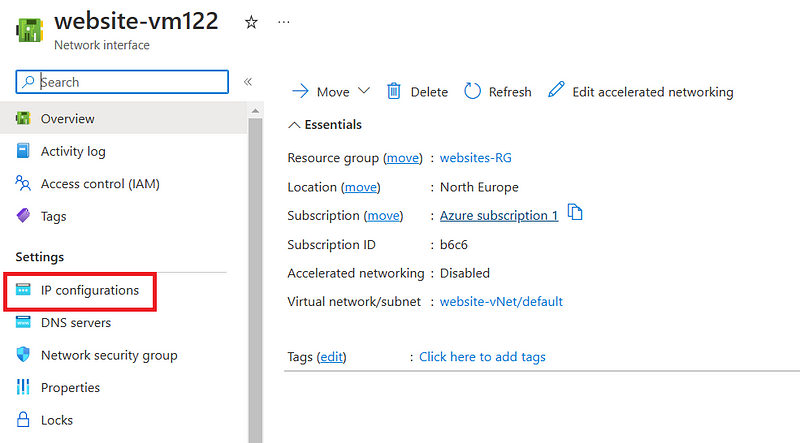
Double-click on ipconfig1 to edit

Associate one of the public IP created previously and make sure to select the static assignment for the private IP. I will explain why later.

Add a second IP configuration to the NIC of the VM for the second website (domain name). Add as many as necessary if you have more websites.

Associate the second public IP address created in the previous section. Assign a static private IP address too.

Finally, our NIC’s IP configurations look like this
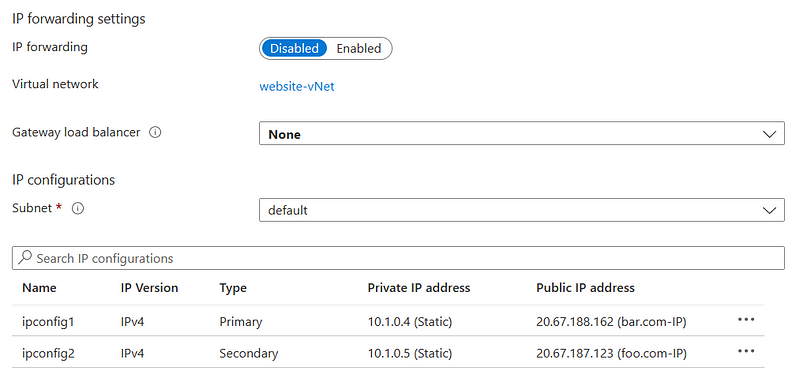
- bar.com
- public IP address: 20.67.188.162
- private IP address: 10.1.0.4
- foo.com
- public IP address: 20.67.187.123
- private IP address: 10.1.0.5
As we can see, both private IP addresses are in the same subnet address range of the website-vNet virtual network. This is important. Take note of the private IP address assigned to each domain name. We will use it later.
Edit of the Network Security Group (NSG)
Create an inbound security rule on the Network Security Group (NSG) to allow incoming HTTP request to reach the VM on port 80/TCP.
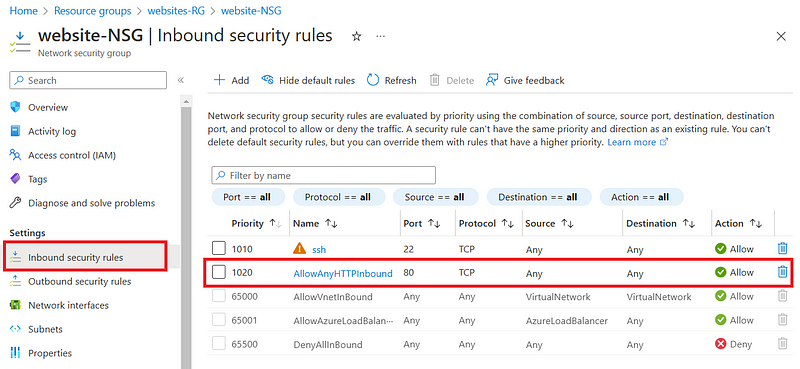
Restart the Virtual Machine
Restart the VM for the changes to take effect

Server configuration
Access to the server terminal via ssh.
Rocky Linux 9 is the Operating System (OS) of my Virtual Machine, so you may need to adapt the commands used below according to the Linux distribution you use.
Switch to root user
sudo -i
Upgrade the system
dnf upgrade -y
Install Apache
dnf install httpd -y
Start and enable the Apache service
systemctl start httpd
systemctl enable httpd
Configure the sites
Create the folder to hold foo.com website’s files
mkdir -p /var/www/foo.com/html
My website’s code is a straightforward index.html file that will display “Welcome to
Edit (nano, vim…) /var/www/foo.com/html/index.html file and paste the following content to it
<html>
  <body>
      <h2>Welcome to foo.com !!</h2>
  </body>
</html>
Create the folder to hold the bar.com website’s files
mkdir -p /var/www/bar.com/html
Edit (nano, vim…) /var/www/bar.com/html/index.html file and paste the following content inside
<html>
  <body>
      <h2>Welcome to bar.com !!</h2>
  </body>
</html>
Each site needs its own file system directory. You’ll place the website’s files, such as HTML, CSS and JavaScript, within this directory. It’s termed the DocumentRoot by Apache, as it’s the root from which documents are served.
Configure Apache
We need to create a Virtual Host file for each of the site. These files define how Apache serves the websites. The term Virtual Host refers to the practice of running more than one website on a single machine. Virtual hosts can be “IP-based”, meaning that you have a different IP address for every website, or “name-based”, meaning that you have multiple names running on each IP address. In our case, we’re going to use the IP-based Virtual Host.
- Create the configuration file
/etc/httpd/conf.d/foo.com.conffor foo.com and paste the following content
<VirtualHost 10.1.0.5:80>
        ServerName www.foo.com
        ServerAlias foo.com
        DocumentRoot /var/www/foo.com/html
        DirectoryIndex index.php index.htm index.html

        CustomLog "/var/log/httpd/foo.com/access.log" combined
        ErrorLog  "/var/log/httpd/foo.com/error.log"

        <Directory /var/www/foo.com/html>
                AllowOverride None
                Order deny,allow
                Deny from all
                Allow from all
        </Directory>
</VirtualHost>
- Create the configuration file
/etc/httpd/conf.d/bar.com.conffor bar.com and paste the following content
<VirtualHost 10.1.0.4:80>
        ServerName www.bar.com
        ServerAlias bar.com
        DocumentRoot /var/www/bar.com/html
        DirectoryIndex index.php index.htm index.html

        CustomLog "/var/log/httpd/bar.com/access.log" combined
        ErrorLog  "/var/log/httpd/bar.com/error.log"

        <Directory /var/www/bar.com/html>
                AllowOverride None
                Order deny,allow
                Deny from all
                Allow from all
        </Directory>
</VirtualHost>
There’s the big trap of this mission.
**Note: The IP address used in the
directive should be the **private** IP address assigned to each site (domain name) in the IP configurations of the NIC.**
Why ?
Because once inbound internet traffic arrives at the public IP address, Azure translates the public address to the private IP address. This means all the network packets arriving at your VM’s NIC have the private IP addresses as destination.
The VirtualHost directive in the configuration file is also used to set the values of ServerAdmin, ServerName, DocumentRoot, ErrorLog and TransferLog or CustomLog configuration directives to different values for each virtual host.
ServerNamethis directive sets the request scheme, hostname and port that the server uses to identify itself.ServerAliasthis directive sets the alternate names for a hostDocumentRootthis directive sets the directory from whichhttpdwill serve files.DirectoryIndexthis directive sets the list of resources to look for, when the client requests an index of the directory by specifying a / at the end of the directory name.ErrorLogthis directive sets the name of the file to which the server will log any errors it encounters<Directory>and</Directory>are used to enclose a group of directives that will apply only to the named directory, subdirectories of that directory, and the files within the respective directories.
Create the logs directories
mkdir -p /var/log/httpd/foo.com/mkdir -p /var/log/httpd/bar.com/
Restart Apache service
systemctl restart httpd
Testing
Let’s test our configuration now !
Open your browser and access to http://publicIP where publicIP is one of the public IP addresses created in the previous section.
In my case, http://20.67.187.123 leads me to foo.com website

While http://20.67.188.162 leads me to bar.com website

Yeaaaah we got it workiing !!
As you can see, Apache correctly serves the websites according to the IP address. All you need now is to update the DNS records of your domain name to point to the correct public IP address. Then you will be able to access to your website by domain name, like http://foo.com or http://bar.com.
In this article, we deployed multiple websites on the same Azure server with different IP addresses. To achieve that, we had to avoid a little trap concerning the IP address translation in Azure. Thank you for reading to the end, and see you soon for new articles. You can reach me on the following platforms: