Calling Azure REST API via python to create/update Azure Network Security Group (NSG) rules
In this article, i’m going to show you how to create or update the security rules of your Azure Network Security Group (NSG) using python and Azure REST API. I assume you already have an Azure subscription and already know how to create an Azure NSG. There are many articles on the topic on the internet. So let’s not waste time and get straight to the point of this tutorial.
The Azure REST API gives us the ability to manage our resources in Azure by sending HTTP requests. But in order to be able to communicate with the API, our python application need to be registered in Azure. To do this, we will connect to the Azure portal and create an application object in our Azure tenant.
Create an application object in Azure Active Directory (Azure AD)
Log into the Azure portal and select Azure Active Directory service.

Select App registrations

Select New registration

Type a name and hit the register button
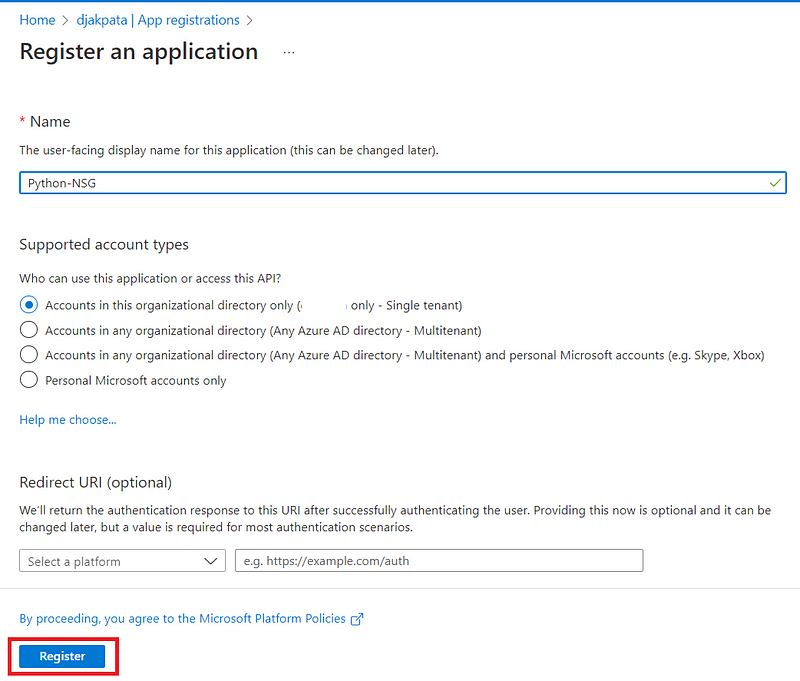
After the creation, we’re redirected to a page like this. Take note of Application (client) ID and Directory (tenant) ID, we will put them in our python code later. Next, we’ll create a secret for our application.
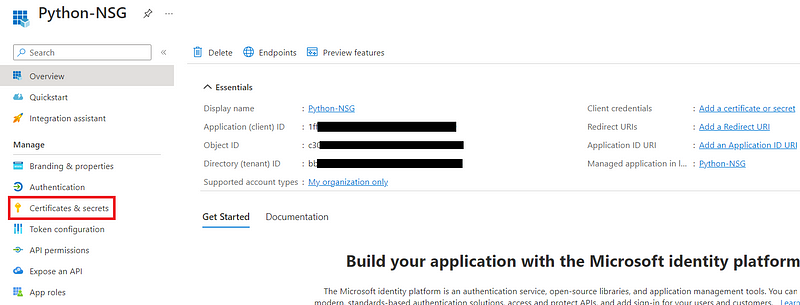
The secret is like a password for our application to be authenticated to Azure Active Directory (which is the authentication service).
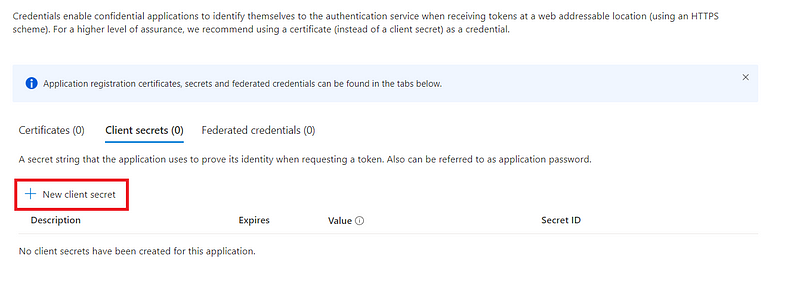
I will choose a validity period of 12 months for the client secret. Based on your needs, you can select a longer or shorter period.

Take note of the value of the secret after the generation. When you close that page, you won’t be able to see it again. We will put it also inside our python code later.

If you would rather use command line to achieve all the things we’ve done in this section, here you go:
az ad sp create-for-rbac --name [APP_NAME] --password [CLIENT_SECRET]
Assign permissions to our application
After authentication, Azure will check if our application has the necessary permissions to perform the requested task. Since I also like to respect the principle of least privilege, we will create a custom role that will only contain the permission to create/update a security rule in the NSG. We will then assign this new role to our application.
Create a custom role
Go to the access control tab of the resource group containing your NSG.


I will name this role “Custom NSG Contributor”

Hit next button to access to the permissions tab.

Select the Read and Write permissions to securityRules

The scope should be populated automatically. If it doesn’t, assign it manually
.

Review and create
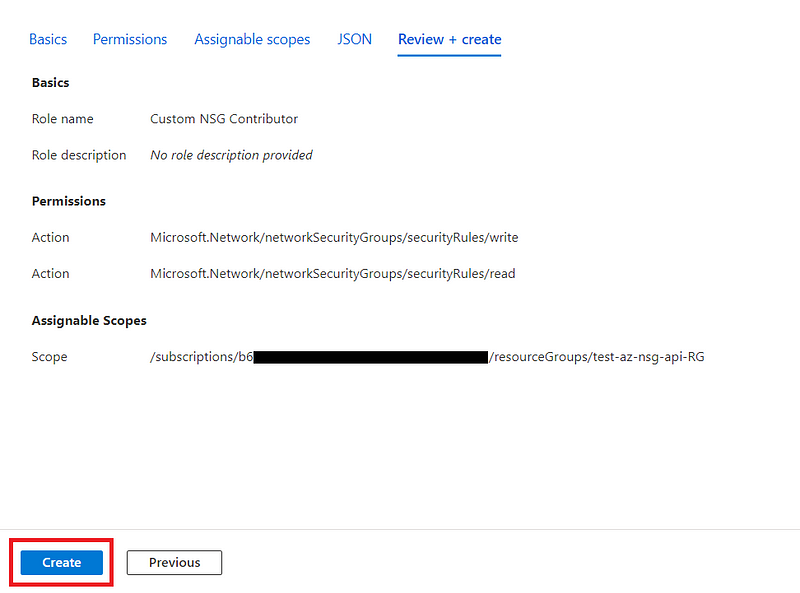
Assign the custom role to our application
After the creation of our “ Custom NSG Contributor “ role, we have to assign it to our “ Python NSG “ application object.
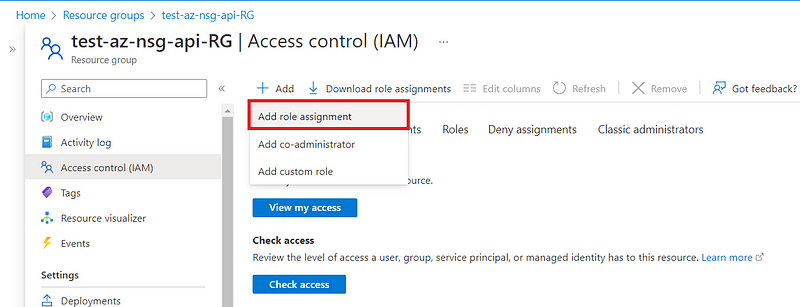
Search for the role and select it.

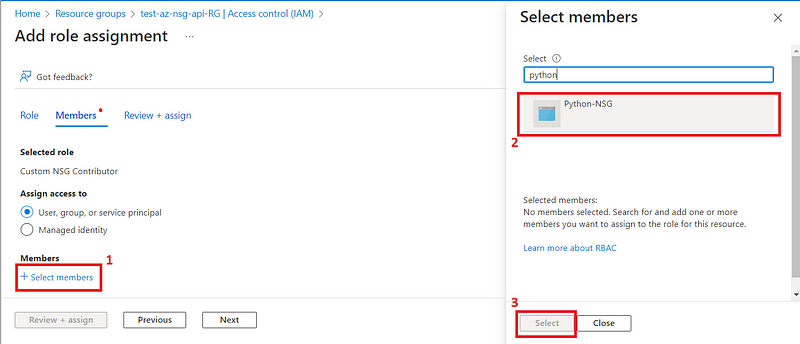
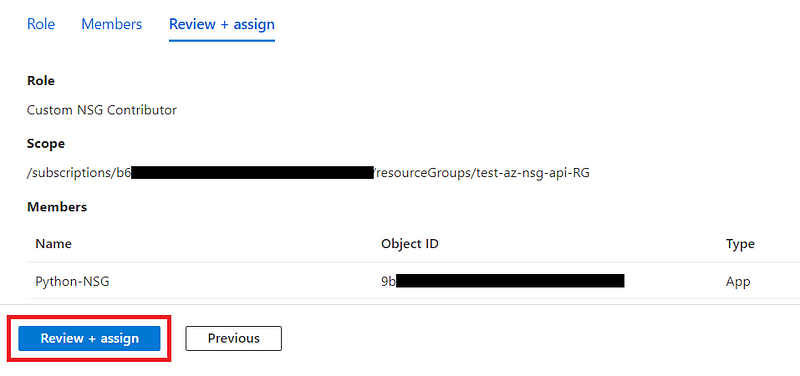
We are done with the Azure portal, let’s move on to the code of our python application.
Calling the API via Python
Download the file below or copy its contents into your code editor.
Replace the values of the following variables with those obtained in the previous sections of this tutorial:
- tenantId
- client_id
- client_secret
- subscriptionId
- resourceGroupName
- networkSecurityGroupName
- securityRuleName
In this sample code above, i’m creating the rule “ AllowAnyHTTPInbound “ with the following properties:
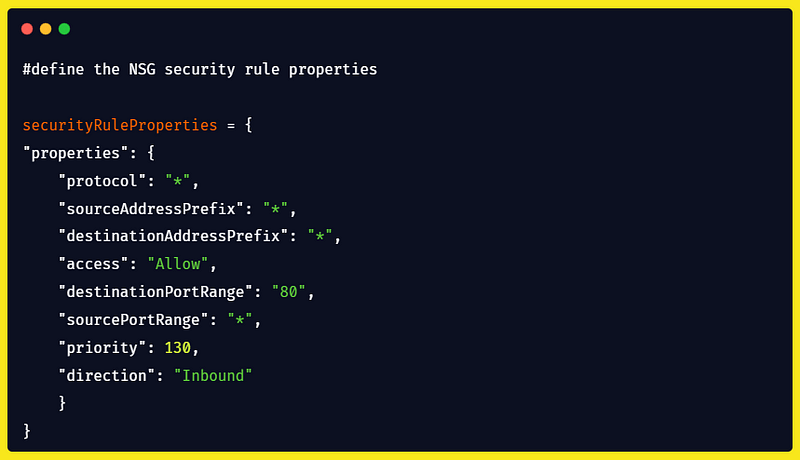
This rule will allow all incoming traffic on port 80.
If you want to know more about the properties of the security rules, I suggest you consult the API documentation which you can find here :
Network Security Groups - Create Or Update - Microsoft Learn
Execution
Execute the code from the terminal:
python3 app.py
Et voilààà !! Congratulations, you get it working.
In this article, we created a security rule in our Network Security Group using the Rest API provided by Azure. Thank you for following this tutorial to the end and see you soon for new articles. You can reach me on the following platforms: