WSL2 - Access to Multipass VMs
In this blog post, I’m going to show you how to access (ping, ssh, etc.) to Multipass VMs running on Windows from WSL2.
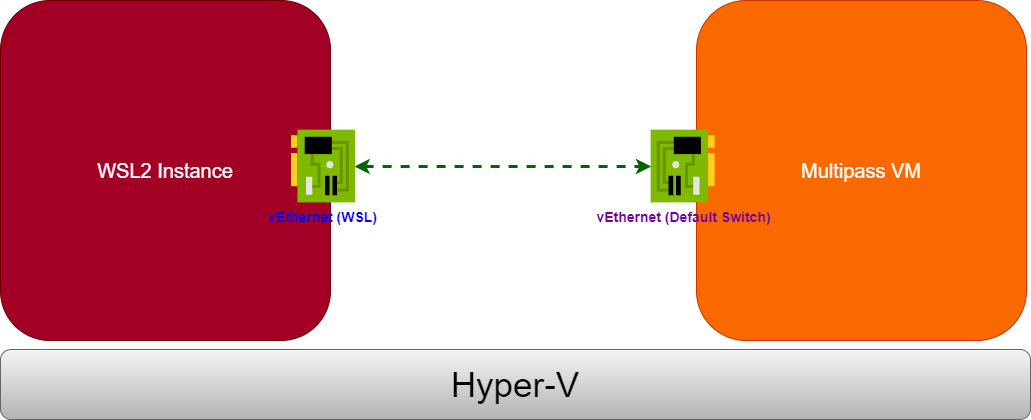
On my Windows 10/11 computer, I have Multipass and WSL2 installed. They both rely on the same hypervisor (Hyper-V) but they DON’T use the same Virtual Network adapter (switch). I mean, when you start a WSL2-based instance, it’s connected to the vEthernet (WSL) adapter, while the Multipass VM is connected by default to the vEthernet (Default Switch) adapter. So they are in different networks, and those two NAT’d networks cannot talk to each other by default. This makes the communication impossible between the instances.
You can list the interfaces (switch) present on your computer via PowerShell:
PS C:\Users\kenneth> Get-NetIPInterface | where AddressFamily -eq "IPv4" | select ifIndex,InterfaceAlias,AddressFamily,ConnectionState,Forwarding | Sort-Object -Property IfIndex | Format-Table

ifIndex InterfaceAlias                AddressFamily ConnectionState Forwarding
------- --------------                ------------- --------------- ----------
      1 Loopback Pseudo-Interface 1            IPv4       Connected   Disabled
      7 Ethernet                               IPv4    Disconnected   Disabled
     10 Connexion au réseau local* 10          IPv4    Disconnected   Disabled
     16 Connexion au réseau local* 1           IPv4    Disconnected   Disabled
     19 Wi-Fi                                  IPv4       Connected   Disabled
     20 Connexion réseau Bluetooth             IPv4    Disconnected   Disabled
     25 vEthernet (Default Switch)             IPv4       Connected   Disabled
     47 vEthernet (WSL)                        IPv4       Connected   Disabled
TLDR - How to actually fix it?
The workaround is to enable forwarding on each interface (adapter).
To do so, open PowerShell console as administrator and run the commands below:
Set-NetIPInterface -ifAlias "vEthernet (WSL)" -Forwarding Enabled
Set-NetIPInterface -ifAlias "vEthernet (Default Switch)" -Forwarding Enabled
We can check if the change is successfully applied:
PS C:\Users\kenneth> Get-NetIPInterface | where AddressFamily -eq "IPv4" | select ifIndex,InterfaceAlias,AddressFamily,ConnectionState,Forwarding | Sort-Object -Property IfIndex | Format-Table

ifIndex InterfaceAlias                AddressFamily ConnectionState Forwarding
------- --------------                ------------- --------------- ----------
      1 Loopback Pseudo-Interface 1            IPv4       Connected   Disabled
      7 Ethernet                               IPv4    Disconnected   Disabled
     10 Connexion au réseau local* 10          IPv4    Disconnected   Disabled
     16 Connexion au réseau local* 1           IPv4    Disconnected   Disabled
     19 Wi-Fi                                  IPv4       Connected   Disabled
     20 Connexion réseau Bluetooth             IPv4    Disconnected   Disabled
     25 vEthernet (Default Switch)             IPv4       Connected    Enabled
     47 vEthernet (WSL)                        IPv4       Connected    Enabled
Now, the instances are able to communicate with each other. Unfortunately, those changes revert to default after a reboot.
Let’s make it persistent across reboot
We need to create a scheduled task via the Windows Task Scheduler, which executes our PowerShell script on WSL2 startup.
Write the script from the previous section into a file and choose a location on your disk to save it. For example, C:\EnableForwardingWSLHyperV\EnableForwarding.ps1.
- Open Task Scheduler by pressing the Windows key + R and typing taskschd.msc in the Run dialog box, then press Enter.
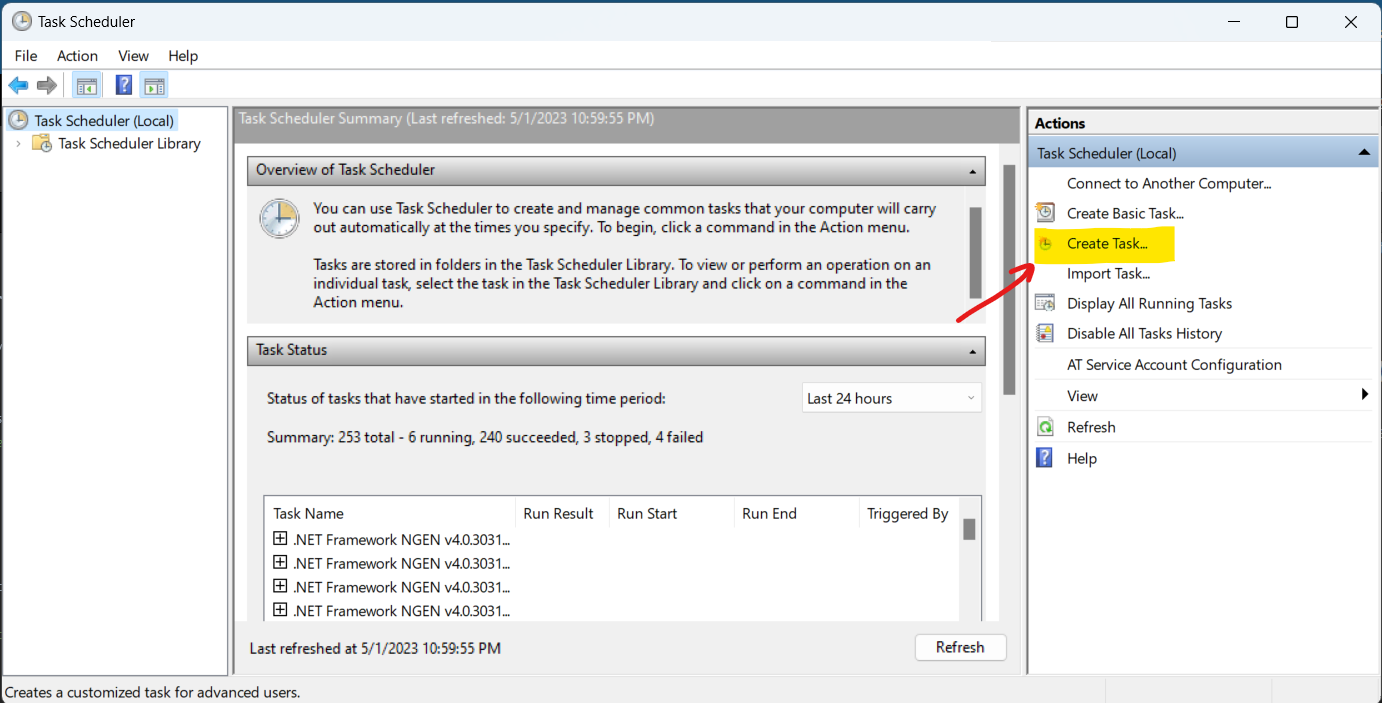
- In the Task Scheduler window, click on Create Task in the right-hand pane.
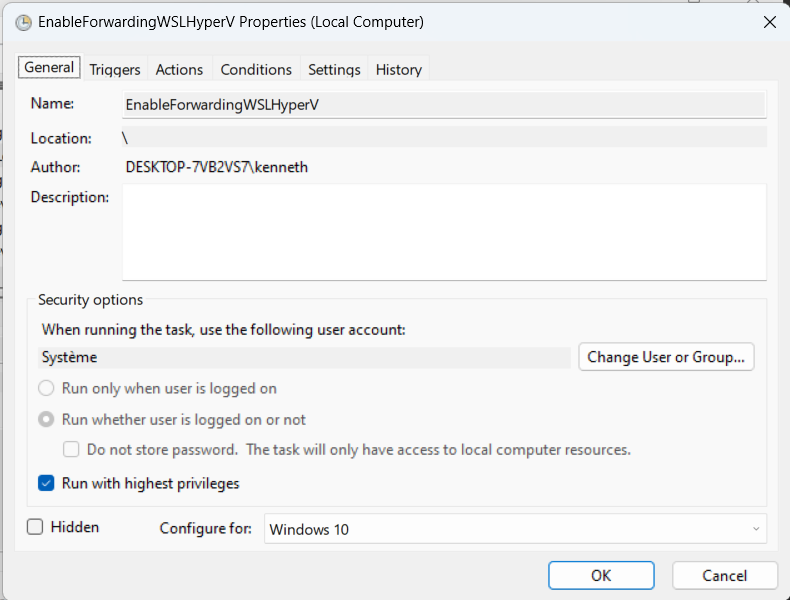
- In the General tab, give the task a name and select Run with highest privileges and Configure for to match your Windows version. Change the User or Group to System
- In the Triggers tab, click New to create a new trigger.
- In the New Trigger window, select On an event from the drop-down menu next to Begin the task. Select System as Log, Hyper-V-VmSwitch as Source, and type 9 for the Event ID.
Click on Enabled and OK to save.

- In the Actions tab, click New to create a new action.
- In the New Action window, select Start a program from the drop-down menu next to Action. Type powershell.exe in Program/script field. Type
-ExecutionPolicy Bypass C:\EnableForwardingWSLHyperV\EnableForwarding.ps1in the Add arguments field whereC:\EnableForwardingWSLHyperV\EnableForwarding.ps1is the full path to your script file. - Click OK to save the action and return to the Create Task window.

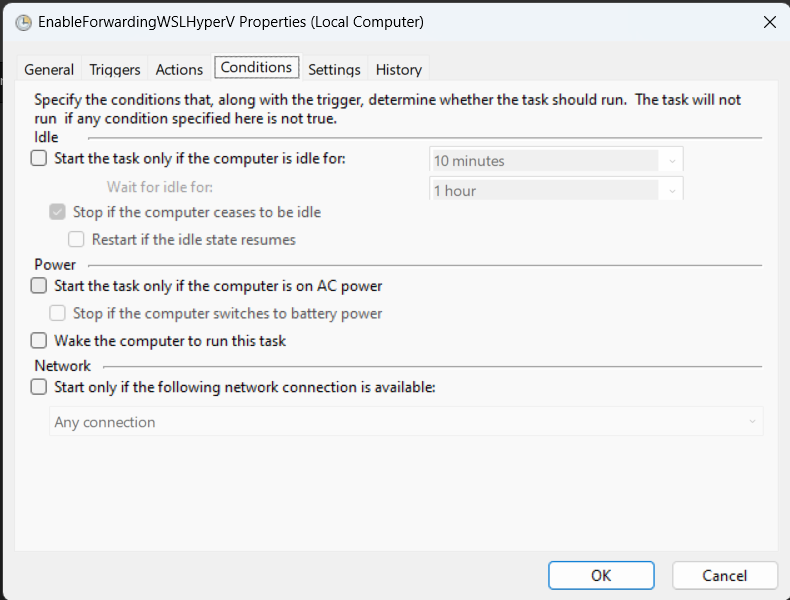
- Make the conditions as below. Then click OK to save the task and exit Task Scheduler.
Read on if you use Docker
This is where things become interesting.
I have Docker installed in my Ubuntu WSL2 instance. Who says docker, also means docker networks. Docker uses by default the following address ranges for his (bridge) networks:
- 172.16.0.0 to 172.31.255.255
- 192.168.0.1 to 192.168.255.254
So when a docker container is created, it gets an IP address from the ranges above. You can run ip route list to view the subnets used by docker networks in your WSL instance and the interfaces mapped to each one.
kenneth@WSL2-instance:~$ ip route list
default via 172.25.16.1 dev eth0 proto kernel
172.17.0.0/16 dev docker0 proto kernel scope link src 172.17.0.1
172.18.0.0/16 dev br-71e0056edb0c proto kernel scope link src 172.18.0.1 linkdown
172.20.0.0/16 dev br-53060e182191 proto kernel scope link src 172.20.0.1
172.21.0.0/16 dev br-4b041d33c6fc proto kernel scope link src 172.21.0.1
172.23.0.0/16 dev br-e590ce2dd094 proto kernel scope link src 172.23.0.1
172.24.0.0/16 dev br-ccd815cbc749 proto kernel scope link src 172.24.0.1
172.25.16.0/20 dev eth0 proto kernel scope link src 172.25.26.109
172.27.0.0/16 dev br-aef2725120e1 proto kernel scope link src 172.27.0.1
172.30.0.0/16 dev br-ebb8959b6203 proto kernel scope link src 172.30.0.1 linkdown
172.31.0.0/16 dev br-694e7fb98934 proto kernel scope link src 172.31.0.1
192.168.0.0/20 dev br-302f21741602 proto kernel scope link src 192.168.0.1 linkdown
192.168.16.0/20 dev br-caac72d20eef proto kernel scope link src 192.168.16.1
Then guess what?
The default network adapter vEthernet (Default Switch) used by Multipass VMs also use the same IP address range. When I try to ping my multipass VM from WSL2, there is a conflict. The traffic is routed to the docker interface (docker0, br-X) instead of the vEthernet (Default Switch) interface.
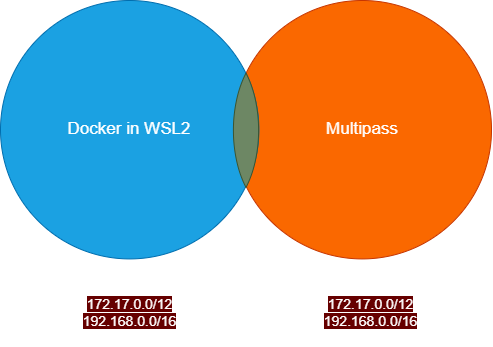
The workaround from the previous section is no more enough.
How to fix that ?
We have to change the IP address ranges used by docker networks or either the one used by the vEthernet (Default Switch) interface.
At the date of this write-up, there is no official documented method to set the vEthernet (Default Switch) adapter’s IP address range. However, it can be achieved through some “hacky” PowerShell script which should be executed at every boot of your Windows computer.
The second option is to change the default docker network IP address ranges. This method is more elegant and is officially supported. So let’s go that way.
From your WSL2 instance terminal, edit the /etc/docker/daemon.json file with the content below. (if the file doesn’t exist, create it)
{
  "bip": "10.54.54.1/24",
  "default-address-pools": [
    {
      "base": "10.55.0.0/16",
      "size": 26
    }
  ]
}
where:
bipis the IP address and netmask to use for Docker’s default bridge using standard CIDR notation.default-address-poolsspecify pools used for creating new networks. This is needed to configure new networks created by Docker Compose.basespecifies the CIDR range to usesizedefines the prefix/netmask for a given subnet allocated within thebasepool above
Then restart the docker service for the changes to take effect
sudo service docker restart
Now all your future containers will automatically get IP address from that pool:
- 10.54.54.0/24
- 10.55.0.0/16
Note: Unfortunately, the existing docker networks subnets won’t be changed. You will have to destroy and recreate them in order to update to the new IP range.
Tips to execute multipass commands from WSL2
To execute multipass commands from a WSL2-based instance, you need to create a symbolic link:
sudo ln -s '/mnt/c/Program Files/Multipass/bin/multipass.exe' /usr/bin/multipass
Where /mnt/c/Program Files/Multipass/bin/multipass.exe is your multipass installation path on the Windows host.
References
- https://github.com/canonical/multipass/issues/1725
- https://github.com/microsoft/WSL/issues/4288
- https://github.com/canonical/multipass/issues/118
- https://straz.to/2021-09-08-docker-address-pools/
- https://medium.com/@jacob.swanson.n/making-docker-use-different-ip-ranges-on-ubuntu-27ba6cbb825d
- https://learn.microsoft.com/en-us/answers/questions/48268/change-hyper-v-(default-switch)-ip-address-range